 Save
Save The first time I tried making these jelly cups, my kitchen smelled like a carnival—bright lemon mingling with the unmistakable fruity sweetness of gummy bears. The sound of the gelatin sloshing around the saucepan reminded me of summer science projects more than anything else. I had a song stuck in my head and drummed my fingers impatiently as the mixture thickened, all the while picturing how photogenic the finished cups would look lined up on the counter. There was a hint of mischief in my mood, sneaking one or two gummy bears before they went into the cups. The anticipation of unmolding them felt almost like unwrapping a gift.
I remember setting out a whole rainbow of gummy bears to let my little cousin choose her favorite colors for each cup—her giggles echoing through the kitchen as we argued over which flavors should go on the bottom. The mess was totally worth it for the look on her face when the first cup wobbled perfectly out of the fridge. Even cleaning the sticky fingerprints off the countertop became part of the fun that afternoon.
Ingredients
- Fresh lemon juice: Using real lemon juice gives a bright, punchy base that bottled just can't mimic—roll lemons on the counter before juicing to get the most flavor.
- Water: Filtering it keeps the jelly crystal clear and lets the lemon and gummy flavors shine.
- Granulated sugar: Just enough to balance the tartness; I've learned not to skimp if you want that classic lemonade finish.
- Unflavored gelatin powder: Three packets are the secret to a sturdy, sliceable jelly layer—let it bloom first for best texture.
- Lemon zest: The zest brings an aromatic freshness and makes the color pop, so don't skip it even if zesting feels fiddly.
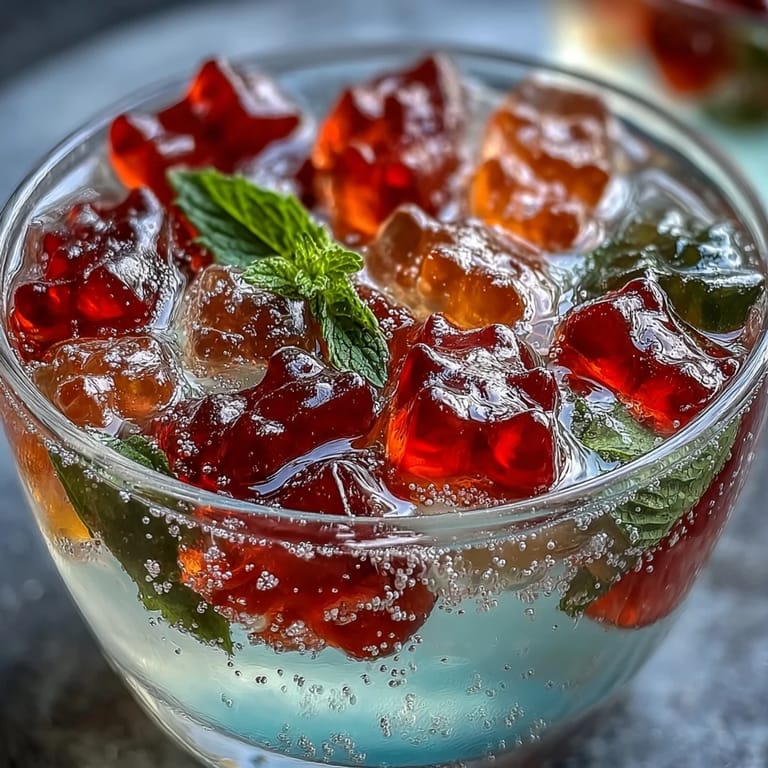
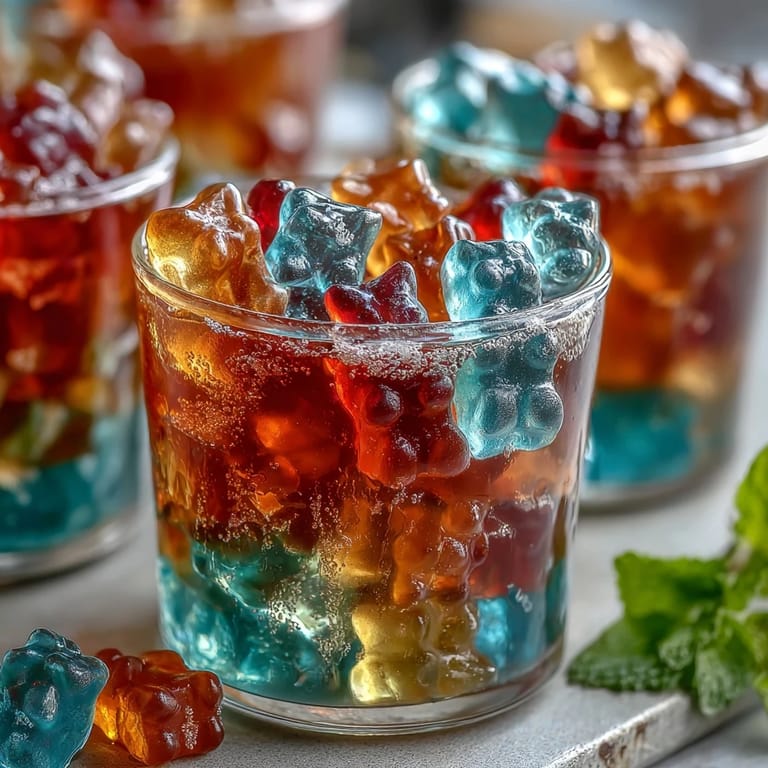
- Assorted gummy bears: The more colors and flavors, the better—press them gently into the cups to keep them from floating.
- Fresh mint leaves (optional): Adds a cooling note and makes the cups look extra polished for parties.
- Lemon slices (optional): I've found a thin slice perched on top is irresistible for presentation—and for bonus lemon punch.
Tired of Takeout? 🥡
Get 10 meals you can make faster than delivery arrives. Seriously.
One email. No spam. Unsubscribe anytime.
Instructions
- Make the lemonade base:
- In a small saucepan, mix lemon juice, water, and sugar, then sprinkle gelatin over it. Let it sit for a couple of minutes until the gelatin turns spongy.
- Dissolve and brighten:
- Place the pan over medium heat and whisk constantly; once the sugar and gelatin melt in (but before it boils), remove from heat and stir in the fragrant zest.
- Layer the gummy bears:
- Count out a cheerful handful of gummy bears for each cup, dropping them into clear serving cups in happy little piles.
- Pour and chill:
- Gently pour the warm lemon-gelatin mixture over the gummy bears, filling each cup without splashing. Let them cool at room temperature briefly, then move to the fridge for their long, wobbly set—about two hours.
- Garnish and serve:
- Once fully set, crown each cup with a sprig of mint and a slice of lemon if you like, then run your spoon through with a satisfying jiggle.
 Save
Save 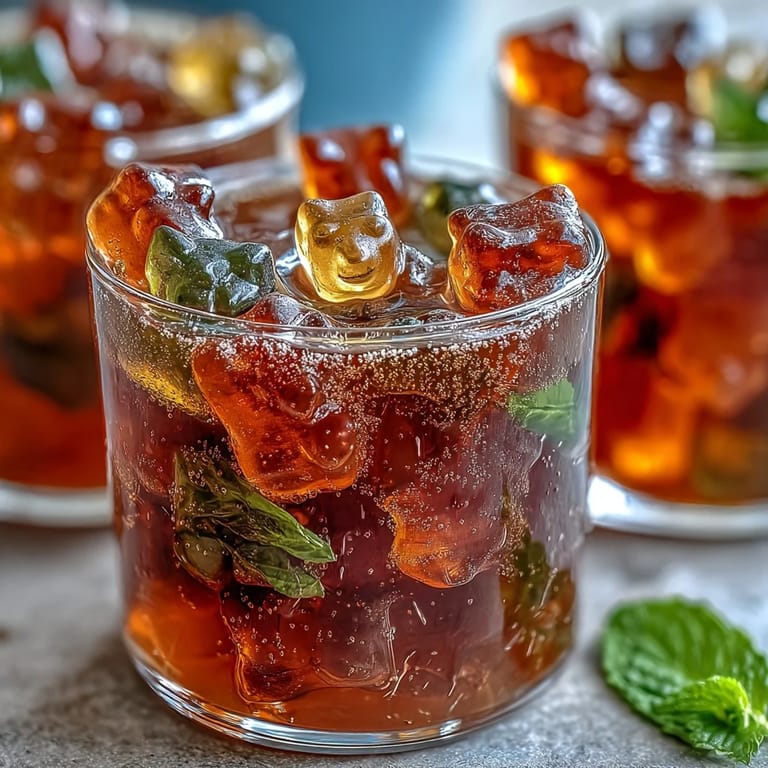 Save
Save Watching my friends poke their spoons through the wobbly tops at a summer picnic, laughing as gummy bears peeked out, I realized these jelly cups turned into everyone’s unexpected favorite. It wasn’t just the taste—it was the playful surprise layered inside each bite, like edible confetti.
Getting the Perfect Jiggle
The magic is in the set: too little gelatin and you’ll have lemonade soup; too much and it’ll chew like rubber. I’ve found timing the chill is everything—leaving them in overnight gets the cleanest cut and the juiciest wobble, but they set enough for serving after a couple hours if you’re pressed for time.
Choosing and Placing the Gummy Bears
Not all gummy bears are created equal—some are coated in a dusting that can cloud the jelly, so a quick rinse and pat dry with paper towels works wonders. Arranging gummy bears in clusters or color gradients makes every cup a little surprise, especially when people discover their favorite flavor hiding inside.
Fun Twists and Variations
Sometimes I swap in sour or cola gummies for a playful tang, or sneak a splash of vodka into the adult batches for grown-up celebrations. For a truly dazzling look, clear cups are non-negotiable—they let every layer and color glimmer through, especially in sunlight.
- Chill your cups in advance for an extra-fast set.
- Use a squeeze bottle to pour the gelatin mixture cleanly, avoiding air bubbles.
- Label adult and kid-friendly versions so there are no surprises at a party.
 Save
Save  Save
Save Whether you’re hosting friends or just want a dash of color on a weekday, these gummy bear lemonade jelly cups promise a little party in every bite. Keep a batch handy—there’s always someone who asks for seconds.
Recipe Questions
- → How long should the cups chill before serving?
Chill for a minimum of two hours to allow the gelatin to fully set. For a firmer texture, refrigerate longer; keep cups covered to avoid absorbing fridge odors.
- → Can I make these without animal gelatin?
Yes. Substitute agar-agar following the package ratio for gelatin alternatives—bring agar to a full boil to activate, then cool slightly before pouring for best set.
- → Which gummy bears work best?
Assorted fruit gummies provide the brightest colors and flavors. Sour or cola-flavored bears add contrast. Choose smaller bears so they spread evenly through each cup.
- → How far ahead can I prepare them?
Prepare up to two days ahead and store covered in the refrigerator. Add mint leaves and lemon slices just before serving to keep garnishes vibrant.
- → Are there any allergen or safety considerations?
Check gummy packaging for allergens and the gelatin source. Some gummies may contain gluten or traces of nuts—swap to allergen-free brands when needed.
- → How can I make an adult version?
For an adult twist, replace up to 1/4 cup of the water with vodka after heating. Avoid boiling alcohol; stir gently and label alcoholic servings for guests.