 Save
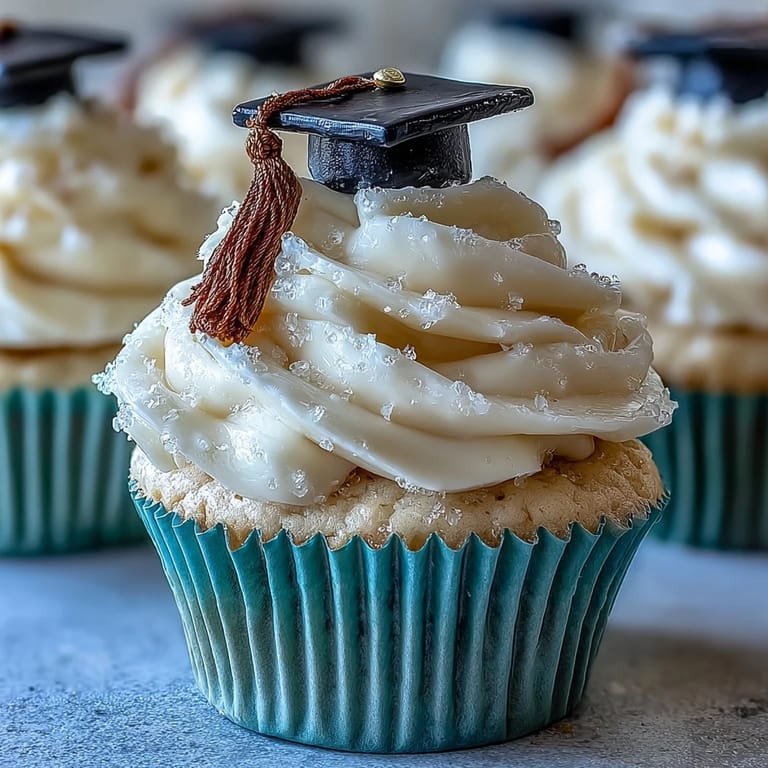
Save The vanilla-scented aroma swirling through the kitchen last June took me entirely by surprise—I was just baking for my cousin's graduation, but the moment felt bigger. I found myself humming along to the chatter outside as I pressed neat fondant squares into line. There&aposs a calm focus to decorating cupcakes, with buttery icing on my fingers and little flecks of gold dust sparkling in the afternoon light. It wasn&apost about perfection, but about making celebration edible. I&aposd never tried tiny graduation caps before, and by the time I had, I was just as delighted as the new grad herself.
I remember my dad swooping into the kitchen as I finished the last gold tassel—he ducked around, stole one bare cupcake, and declared it needed twice as much frosting. We ate, we laughed, and I ended up piping just a little more onto each one, all while everyone else snuck peeks at my miniature fondant assembly line. The family chatter felt contagious, energizing each detail. In that moment, it was about marking the day with flavor and color, not just photos. There was a freedom in letting the decorations each look a little unique.
Ingredients
- All-purpose flour: Friends joked that I measured it too precisely one year—level it off for a fine crumb every time.
- Baking powder: Don&apost skip this; fresh baking powder is my insurance for fluffy cake.
- Salt: Just a pinch brings out every sweet note—trust me, you&aposll notice if you forget.
- Unsalted butter: Starting with softened butter changed everything about my mixing—it makes both the cake and frosting silkier.
- Granulated sugar: It&aposs the backbone of flavor and tenderness in the cupcakes.
- Large eggs: Room temperature eggs are my trick for a smooth, even batter.
- Vanilla extract: True story: I once tried imitation, and the real stuff made such a difference I never went back.
- Whole milk: Makes the cupcakes tender and rich—don&apost use skim here.
- Powdered sugar: Sift it for cloud-like frosting every time, even if you&aposre tempted to skip it.
- Cornstarch: Not just for thickening—dusting your counter keeps fondant from sticking during the fun part.
- Black fondant: This brings those graduation caps to life, so go for a brand that rolls out smoothly.
- Gold fondant: Adds a playful, celebratory shine no one can resist.
- Edible adhesive or water: My tiny paintbrush makes cap assembly feel like crafting, not cooking.
- Edible gold dust (optional): A light brush instantly upgrades the look to pro-baker level.
Tired of Takeout? 🥡
Get 10 meals you can make faster than delivery arrives. Seriously.
One email. No spam. Unsubscribe anytime.
Instructions
- Prep your tin:
- Line your muffin tin with bright cupcake liners—pick festive ones if you have them. Preheat the oven to 350 F so you can work without waiting.
- Mix dry ingredients:
- Whisk flour, baking powder, and salt together in a bowl, hearing that soft sifting sound—it&aposs the start of something good.
- Cream butter and sugar:
- Beat the softened butter with sugar until it&aposs pale and fluffy, stopping to sneak a taste and swipe down the bowl.
- Add eggs and vanilla:
- Crack in the eggs one at a time, beating after each, then swirl in vanilla until the fragrance is unmistakable.
- Combine wet and dry:
- Add flour mix to butter mixture, alternating with milk, until just blended—don&apost overmix or the cupcakes will protest later.
- Bake and cool:
- Scoop batter into the liners and bake 18–20 minutes—you&apoll know they&aposre done when a toothpick comes out clean. Transfer to a rack and admire them as they cool.
- Make buttercream:
- Whip butter, powdered sugar, milk, vanilla, and salt together for a minute or two, then watch it turn from thick to creamy white and fluffy.
- Decorate with buttercream:
- Load up a piping bag or just spoon it onto each cupcake, swirling generously—it&aposs the edible cushion for those fancy caps.
- Shape fondant caps:
- Dust a surface with cornstarch, roll out black fondant, and slice into neat little squares for cap tops.
- Assemble cap bases:
- Roll black fondant into small balls, flatten them, and fix a square to each using a bit of edible adhesive or water—suddenly they look like the real thing.
- Craft gold tassels:
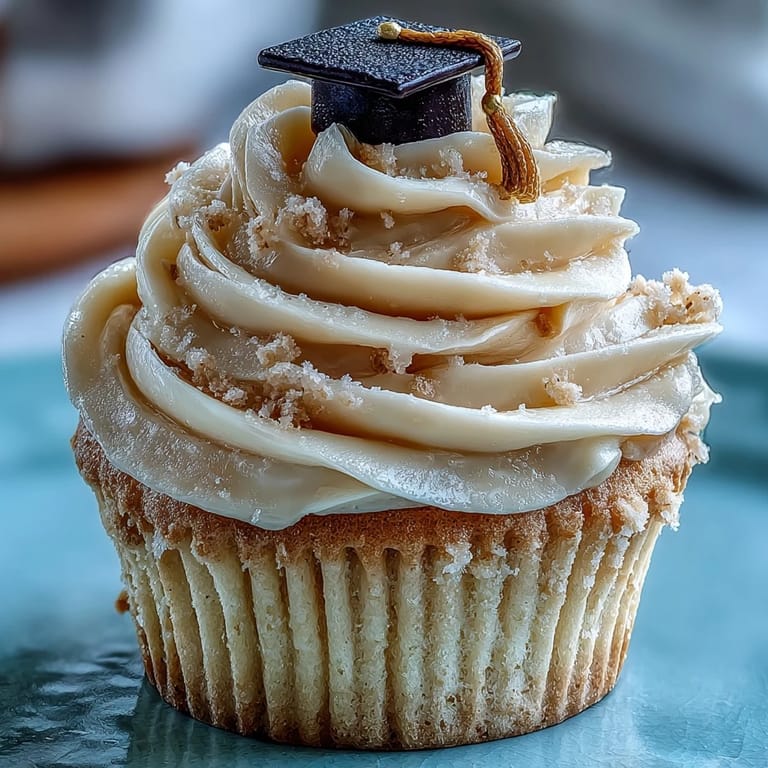
- Roll gold fondant into skinny ropes, attach them to each cap, and dot a tiny ball for the center button—this is the whimsical part.
- Top and finish:
- Set each fondant cap gently onto a frosted cupcake, dust with gold for sparkle, and step back to admire your edible graduation parade.
 Save
Save  Save
Save I watched everyone bite into their cupcakes just after the speeches, black and gold caps scattered and laughter echoing around the table. For a moment, these treats were more than just dessert—they held the celebration right in your hand.
Making Fondant Decorations Effortless
My first go at fondant was a sticky business, but using cornstarch for dusting kept everything from gluing itself to my countertop. Cutting each cap to about 4 cm gives them just the right look, but don&apost stress about perfection; a little unevenness only adds to the homemade charm. I found cupping my palm around the cap base helps shape them faster. Don&apost be shy about adding extra gold dust either. If you get on a rhythm, you might find it oddly satisfying—almost meditative.
How To Get The Creamiest Buttercream
Once, I rushed my buttercream and ended up with lumpy frosting—I learned to let my butter truly soften to room temperature for the silkiest result. Sifting the powdered sugar is another non-negotiable; it&aposs how the frosting goes from heavy to impossibly light. If your icing feels too thick, add an extra spoonful of milk until it spreads like a dream. A good 2–3 minutes of beating fluffs everything up. And don&apost worry if you get a bit on your sleeve; it&aposs a badge of honor.
Troubleshooting Your Celebration Cupcakes
Overfilling the liners will lead to mushroom tops that&apossometimes split—filling them just two-thirds full made a real difference. If your fondant feels stiff, knead it for a few minutes until it softens up and loses those cracks. After assembling the caps, I sometimes pop them in the fridge for 10 minutes to help everything set before transferring to the cupcakes.
- If you&apose storing overnight, wait to add fondant caps until just before serving.
- For a vegan twist, stick to plant-based butter and milk—the results surprised me.
- Always double-check fondant labels if serving anyone with allergies.
 Save
Save 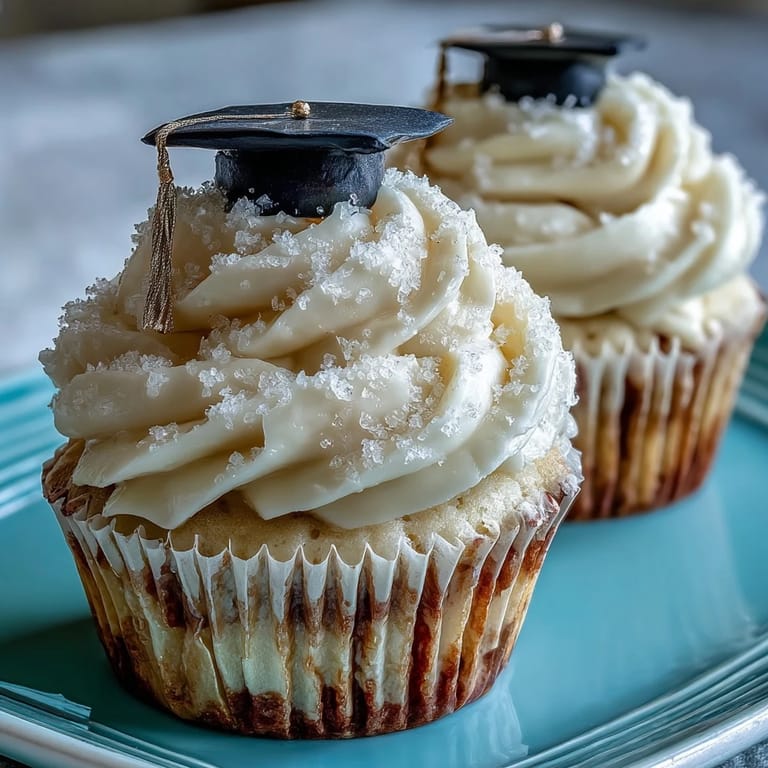 Save
Save Whether you&aposre feeding a crowd or just celebrating one special grad, these cupcakes bring a little sparkle to the moment. Don&apost be surprised if people ask when you&aposll make them again.
Recipe Questions
- → Can I make the cupcakes ahead of time?
Yes. Bake and cool the cupcakes fully, then keep them in an airtight container for up to a day. Frost and place fondant caps shortly before serving to preserve fondant detail.
- → How do I keep fondant from sticking while rolling?
Lightly dust your work surface with cornstarch and thinly dust your rolling pin. Use small amounts so the fondant doesn’t dry out, and knead briefly to soften before rolling.
- → What’s the best way to attach fondant pieces?
Use a tiny dab of edible adhesive or plain water applied with a brush. Press gently to join pieces and allow a few minutes to set before moving the finished caps.
- → How can I make the buttercream stable for piping?
Use cold, unsalted butter at room temperature and add sifted powdered sugar gradually. Beat until light and fluffy, and chill briefly if it becomes too soft for clean piping.
- → Any tips for making tidy tassels and buttons?
Roll gold fondant into thin ropes, then press one end to the cap top and add a tiny fondant ball as a button. Use a toothpick to texture the tassel for a realistic look.
- → Can I swap ingredients for dietary needs?
Yes. Use plant-based butter and a non-dairy milk to make a dairy-free version; check fondant labels for vegan suitability and allergen traces.