 Save
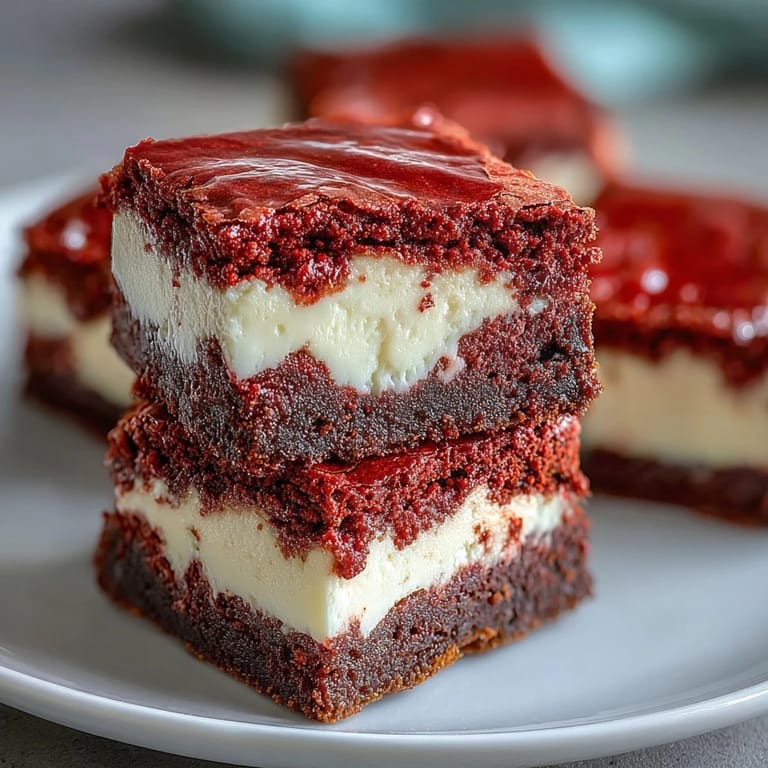
Save My sister showed up one February with a Tupperware full of these brownies, and I didn't believe her when she said she'd made them herself. The swirls looked too perfect, the layers too distinct. She laughed and told me it was easier than it looked, that the batter does most of the work. I made them the following weekend just to prove I could, and she was right.
I brought a batch to a potluck once, and people kept asking if I'd ordered them from a bakery. One friend even tried to guess which local shop I'd gone to. When I admitted I'd baked them that morning, the requests started rolling in. Now I make them every Valentine's Day, and sometimes just because the craving hits.
Ingredients
- Unsalted butter: Melted butter blends smoothly into the batter and gives the brownies that fudgy texture you can't get from oil.
- Granulated sugar: Used in both layers, it dissolves completely and keeps the crumb tender without graininess.
- Eggs: Room temperature eggs incorporate faster and create a smoother batter, especially in the cheesecake layer.
- Vanilla extract: A small amount in each layer deepens the flavor and balances the cocoa and tang from the cream cheese.
- Red food coloring: Gel works better than liquid because it won't thin out your batter, and the color stays vibrant after baking.
- All-purpose flour: Just enough to give structure without making the brownies cakey or dry.
- Unsweetened cocoa powder: This is what makes red velvet taste like red velvet, a hint of chocolate without overpowering the tangy cheesecake.
- Cream cheese: Softened cream cheese beats into a lump-free filling that stays creamy even after chilling.
Tired of Takeout? 🥡
Get 10 meals you can make faster than delivery arrives. Seriously.
One email. No spam. Unsubscribe anytime.
Instructions
- Preheat and prep your pan:
- Set your oven to 175°C (350°F) and line your baking pan with parchment, letting the edges hang over the sides. This makes lifting the brownies out later so much easier.
- Mix the red velvet base:
- Whisk melted butter and sugar until they're smooth and glossy, then beat in the eggs, vanilla, and food coloring until the batter turns that deep crimson color. Sift in the flour, cocoa, and salt, folding gently just until no streaks remain.
- Reserve batter for swirling:
- Scoop out about 1/4 cup of the red velvet batter into a small bowl and set it aside. Spread the rest evenly into your prepared pan.
- Make the cheesecake layer:
- Beat the softened cream cheese until it's completely smooth, then add sugar, egg, and vanilla, mixing until the filling is creamy and free of lumps. Pour this gently over the red velvet layer and spread it out with a spatula.
- Create the swirls:
- Drop spoonfuls of the reserved red velvet batter on top of the cheesecake, then drag a knife or skewer through in gentle curves. Don't overthink it, the swirls will look beautiful no matter what.
- Bake until just set:
- Slide the pan into the oven and bake for 35 minutes, checking that the center is set but still slightly jiggly. A toothpick should come out with a few moist crumbs clinging to it.
- Cool and chill:
- Let the brownies cool completely in the pan on a wire rack, then refrigerate for at least 2 hours before slicing. Cold brownies cut much cleaner and the cheesecake layer firms up beautifully.
 Save
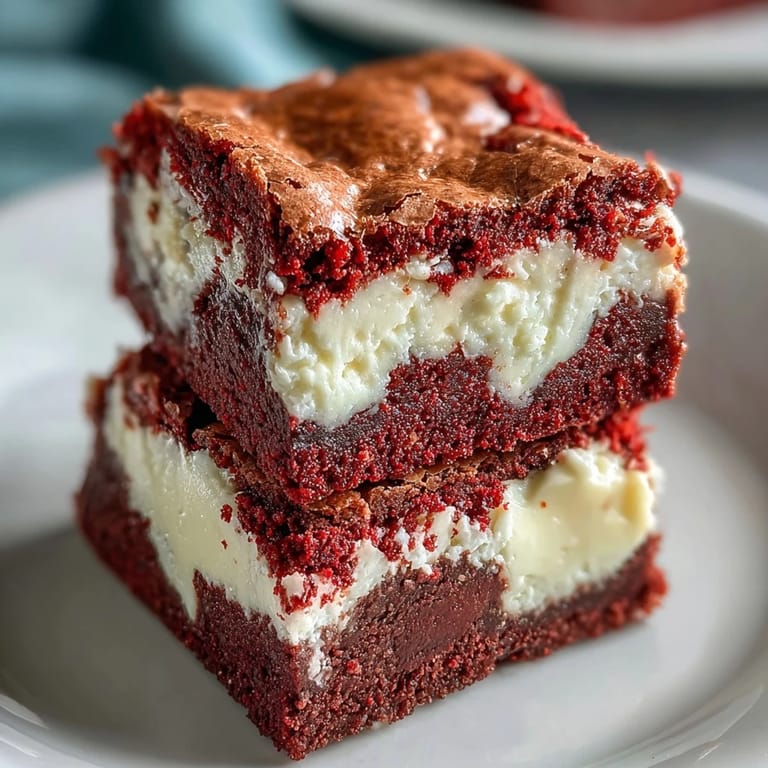
Save The first time I served these at a holiday dinner, my nephew asked for seconds before he'd even finished his first piece. He's picky about desserts, so watching him sneak a third square when he thought no one was looking felt like the highest compliment. These brownies have a way of turning skeptics into believers.
Getting the Swirls Right
You don't need a steady hand or any special technique to make the swirls look bakery-perfect. I've done them with a butter knife, a chopstick, even the handle of a wooden spoon. The key is not overdoing it, just a few gentle figure-eights or lazy S-curves and you're done. If you swirl too much, the layers blend together and you lose that striking contrast.
Storage and Make-Ahead Tips
These brownies actually taste better the next day after the flavors have had time to settle and meld. I always make them a day ahead if I'm bringing them somewhere. They keep in an airtight container in the fridge for up to five days, though they've never lasted that long in my house. You can also freeze them for up to two months, just wrap each square individually in plastic wrap and stack them in a freezer bag.
Variations and Add-Ins
Sometimes I fold white chocolate chips into the red velvet batter before spreading it in the pan, and the little pockets of melted chocolate make them even more indulgent. A friend of mine adds a handful of chopped pecans to the cheesecake layer for crunch. You could also swirl in a spoonful of raspberry jam with the reserved batter for a fruity twist.
- Try mini chocolate chips in the brownie layer for extra richness
- A pinch of espresso powder in the batter deepens the chocolate flavor without tasting like coffee
- Dust the tops with powdered sugar before serving for a simple, elegant finish
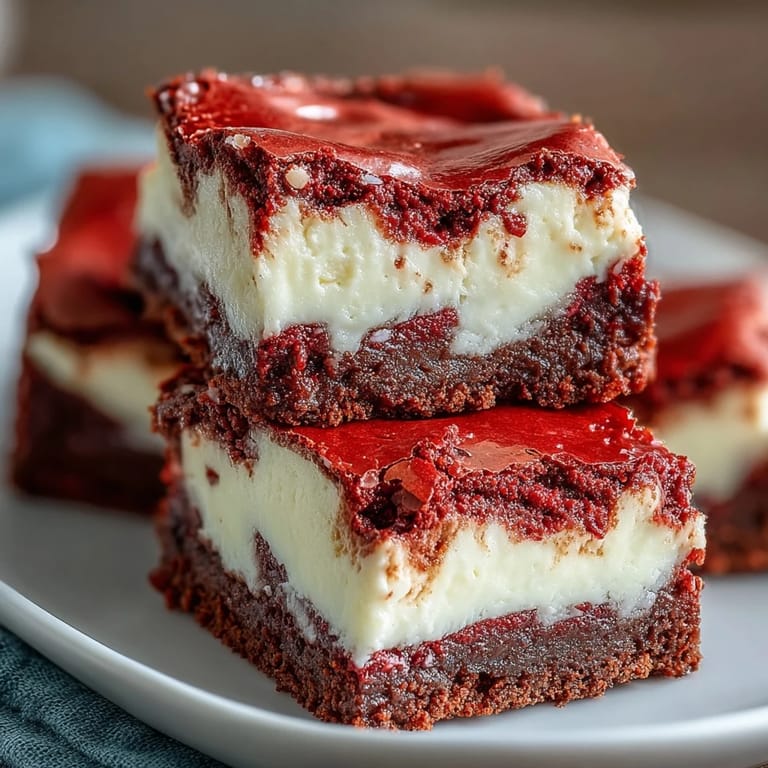 Save
Save These brownies have become my go-to whenever I need to bring something that feels special without spending all day in the kitchen. They're rich, beautiful, and always disappear faster than I expect.
Recipe Questions
- → Can I use natural food coloring instead of red dye?
Yes, you can use natural red food coloring, though the color may be less vibrant. Beet powder is a popular natural alternative, but it may slightly alter the flavor.
- → How do I know when the brownies are done baking?
The center should be just set and a toothpick inserted should come out with a few moist crumbs, not wet batter. The cheesecake layer will have a slight jiggle but will firm up as it cools.
- → Can I freeze these brownies?
Absolutely! Wrap individual squares tightly in plastic wrap, then store in a freezer-safe container for up to 3 months. Thaw in the refrigerator overnight before serving.
- → Why do my ingredients need to be at room temperature?
Room temperature eggs and cream cheese blend more smoothly, creating a silkier cheesecake layer without lumps. This ensures even texture and better integration with the brownie base.
- → Can I make these in a different pan size?
Yes, but adjust baking time accordingly. A 9x9-inch pan will yield slightly thinner brownies and may need 5 minutes less baking time. A 9x13-inch pan will require about 10 minutes less.
- → How should I store leftover brownies?
Store in an airtight container in the refrigerator for up to 5 days. The cheesecake layer requires refrigeration to maintain food safety and optimal texture.