 Save
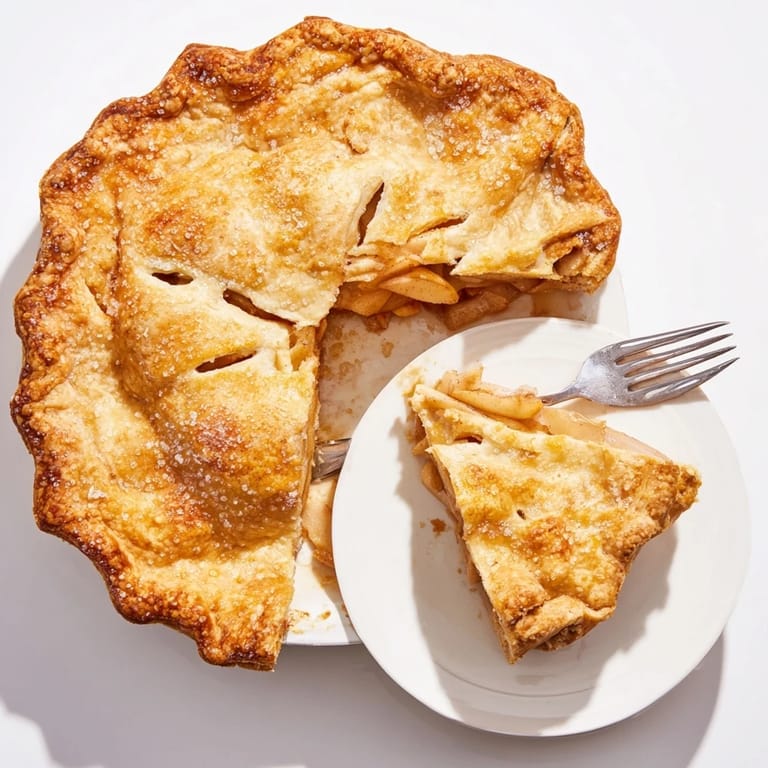
Save The first time I made apple pie, I was eighteen and trying to impress someone new. My tiny apartment kitchen smelled like cinnamon and anxiety. The crust turned out slightly lopsided, bubbling filling escaped through my clumsy steam vents, and we ended up eating it straight from the pie dish with spoons. That imperfect pie taught me more than any perfect recipe could have.
Last Thanksgiving, my niece watched me make this pie, asking a million questions about why I was cutting butter into flour and what would happen if I forgot the lemon juice. We made a mess of the kitchen, flour everywhere, but when that pie came out of the oven golden and gorgeous, she looked at me like I had performed magic. Now she asks to help every time, and honestly, I love having someone to share the waiting time with.
Ingredients
- 2 1/2 cups all-purpose flour: This foundation needs to be measured properly, not scooped directly from the bag, or your crust will turn out tough
- 1 tsp salt: A small amount that makes all the difference in balancing the sweetness and bringing forward the butter flavor
- 1 tbsp granulated sugar: Just enough to help the crust brown beautifully without making it too sweet
- 1 cup unsalted butter, cold and cubed: The temperature matters so much, keep it ice cold and work quickly to maintain those crucial butter pockets
- 6–8 tbsp ice water: Add this gradually, you might need less than called for depending on humidity and how you measure your flour
- 6–7 medium apples: The mix of Granny Smith for structure and Honeycrisp for sweetness is what makes this filling sing
- 3/4 cup granulated sugar: This sweetens the filling without overpowering the natural apple flavor
- 1/4 cup packed light brown sugar: Adds a lovely caramel note and helps create that gorgeous thick sauce around the apples
- 1 1/2 tsp ground cinnamon: The classic spice that makes everything smell like comfort and home
- 1/4 tsp ground nutmeg: A warm background note that pairs perfectly with the cinnamon
- 2 tbsp all-purpose flour: This thickens the juices as the apples cook down, preventing a soggy bottom crust
- 1 tbsp lemon juice: Brightens everything and keeps the apples from oxidizing while you work
- 2 tbsp unsalted butter, cut into small pieces: These little butter dots melt into the apples creating pockets of rich flavor
- 1 egg, beaten: Creates that gorgeous golden shine on the finished crust
- 1 tbsp milk: Thins the egg wash slightly for easier brushing
- 1 tbsp coarse sugar: Optional but adds such a lovely crunch and sparkle to the finished pie
Tired of Takeout? 🥡
Get 10 meals you can make faster than delivery arrives. Seriously.
One email. No spam. Unsubscribe anytime.
Instructions
- Mix your dry ingredients for the crust:
- Whisk the flour, salt, and sugar together in a large bowl until combined, making sure there are no lumps of salt or sugar remaining
- Cut in the cold butter:
- Add the cold cubed butter and use a pastry blender or your fingertips to work it in until the mixture looks like coarse crumbs with some pea-sized pieces still visible
- Add ice water gradually:
- Start with 6 tablespoons of ice water, stirring gently with a fork, and add more only if the dough is not coming together when squeezed
- Form and chill the dough:
- Divide the dough in half, shape each portion into a flat disk, wrap tightly in plastic, and refrigerate for at least one hour or up to two days
- Prep your apples:
- Peel, core, and slice your apples about a quarter inch thick, tossing them immediately with the lemon juice to prevent browning
- Mix the filling:
- Combine the sliced apples with both sugars, cinnamon, nutmeg, salt, flour, and lemon juice until every piece is evenly coated
- Heat your oven:
- Preheat to 400°F with the oven rack in the lower position to help the bottom crust cook through properly
- Roll out the bottom crust:
- On a lightly floured surface, roll one disk into a 12-inch circle, moving the dough frequently to prevent sticking, then carefully transfer it to your pie dish
- Fill the pie:
- Pile in the apple mixture, mounding it slightly higher in the center since it will cook down, and dot the top with the small butter pieces
- Add the top crust:
- Roll out the second disk, place it over the filling, trim the overhang to one inch, then fold and crimp the edges sealed
- Create steam vents:
- Cut several slits in the top crust in a pattern of your choice, making sure they go all the way through to release steam
- Add the egg wash:
- Whisk the egg with the milk and brush it generously over the entire top crust, then sprinkle with coarse sugar if desired
- Bake until golden:
- Bake for 45 to 55 minutes until the crust is deep golden and the filling is bubbling visibly through the vents, covering the edges with foil if they brown too quickly
- Cool completely:
- Let the pie rest on a wire rack for at least two hours before slicing, giving the filling time to set properly
 Save
Save There is something deeply satisfying about placing a homemade pie on the table, watching peoples faces light up before they even take a bite. My grandmother always said the secret ingredient was the love you put into making it, but I think part of that love is the time and care you take with each step. Every time I serve this now, I think about that lopsided first pie and how far we have both come.
Making It Your Own
One of the beautiful things about apple pie is how it welcomes personal touches while remaining unmistakably itself. I have added handfuls of fresh cranberries in autumn, swapped in pears for a softer filling, and even played with different spice combinations. Last Christmas I threw in some chopped pecans with the apples and it became an instant family tradition.
The Crust Game
Your first few attempts at pie crust might feel frustrating, and that is completely normal. The key is keeping everything cold and working the dough as little as possible. If it starts to feel like it is fighting back or the butter is melting, just pop everything back in the refrigerator for 15 minutes. There is no shame in taking breaks, and the difference in texture is worth every pause.
Serving Suggestions
While vanilla ice cream is the classic pairing, do not be afraid to try something new. A sharp cheddar wedge alongside a warm slice creates this incredible sweet and salty contrast that converts even the skeptics. For dinner parties, I like to warm individual slices slightly and serve them with a small pitcher of warm custard on the side.
- Leftover pie keeps beautifully at room temperature for up to two days, or refrigerated for up to five
- A pie bird or ceramic vent can help prevent overflowing while still allowing steam to escape
- Freeze unbaked pies for up to three months, baking them straight from frozen and adding about 15 minutes
 Save
Save There is no dessert that says home quite like apple pie, fresh from the oven and waiting for someone you love to walk through the door. I hope this recipe becomes part of your own story, creating moments and memories that smell like cinnamon and feel like belonging.
Recipe Questions
- → What type of apples work best for filling?
A mix of Granny Smith and Honeycrisp apples provides the perfect balance. Granny Smiths offer tartness and hold their shape during baking, while Honeycrisps add natural sweetness. You can also use Braeburn, Jonagold, or Pink Lady varieties.
- → Why must the pie cool for 2 hours before slicing?
The filling needs time to set and thicken as it cools. Cutting into a hot pie will cause the apple juices to run, resulting in a soggy bottom crust. Patience ensures clean, picture-perfect slices.
- → How do I prevent the crust edges from burning?
If the edges brown too quickly, cover them with a pie shield or create a ring from aluminum foil. Place it over the edge crust once the pie has baked for about 25-30 minutes, then continue baking until done.
- → Can I make the dough ahead of time?
Absolutely. Prepare the dough disks, wrap tightly in plastic, and refrigerate for up to 2 days or freeze for up to 3 months. Thaw frozen dough in the refrigerator overnight before rolling out.
- → How should I store leftover pie?
Cover loosely with foil or plastic wrap and keep at room temperature for up to 2 days. For longer storage, refrigerate for up to 5 days. To reheat, warm individual slices in a 350°F oven for about 10 minutes.
- → Can I make a lattice top instead of a full crust?
Certainly. After rolling out the second dough disk, cut it into strips about 1/2 inch wide. Weave them over the filling in a lattice pattern, then trim and crimp the edges as usual.